Tips n’ Tricks Tuesday is your dedicated source for valuable insights, clever hacks, and expert advice that will empower you to tackle masonry challenges with finesse and efficiency. Every Tuesday, we’re here to share a treasure trove of knowledge that covers a wide spectrum of topics, ensuring that you have the tools and know-how to make your masonry projects more enjoyable, productive, and satisfying. Our first post will assist you in embarking on a natural stone wall creation project.
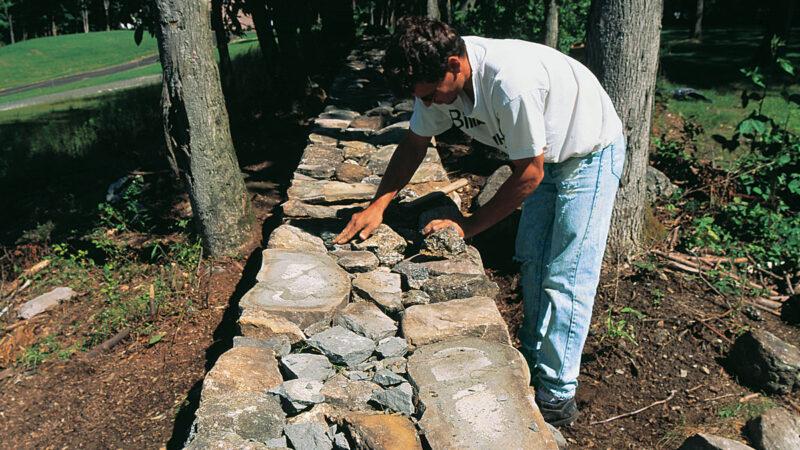
Building a natural stone wall demands a fair amount skill because it avoids using mortar, relying instead on stones that interlock like an intricate jigsaw puzzle to ensure the wall’s stability. However, the allure of a natural stone wall lies in its resilience, as it’s, maybe surprisingly, less prone to collapse. The durability of natural stone walls comes from its ability to facilitate better water drainage, allowing it to withstand higher hydraulic pressures. Additionally, natural stone walls prove hardy against weather-related wear and tear, making them an attractive alternative to mortar-based walls.
Beyond the practical advantages, many also favor the aesthetic of natural stone walls, reminiscent of the rugged charm of early settlers’ farm walls.
Take a look into our informative material below, which provides a comprehensive guide on the steps, materials, and terminology essential for building a sturdy natural stone wall.
DIY Guide: How to Build a Natural Stone Wall
Building natural stone retaining walls not only enhance the beauty of your property, but also add value by creating level ground from slopes. These projects are well within the reach of most homeowners, offering a sense of accomplishment and enhancing the aesthetic appeal of your surroundings.
Tips for Wall Construction:
Placement on Slopes:
Position the wall in the middle of the slope, ensuring an equal amount of soil is removed for backfill. On uneven terrain, maintain a consistent contour from the bottom while laying courses flat to create a wall of varying heights with a level top.
Wall Thickness:
All natural stone walls should have a thickness equal to half of their overall height. For stability, construct walls leaning back toward the slope at a rate of about two inches per foot of height.
Structural Integrity:
Walls exceeding two and a half feet in height require bonding stones and a drainage system for long-term stability. Bonding stones provide structural and lateral strength. Proper drainage is crucial, as hydraulic pressure is a common cause of wall failure.
Drainage System:
For walls over two and a half feet tall, leave a twelve-inch wide space behind the wall and place a four-inch perforated drainpipe at the bottom. Backfill with clean aggregate and separate the drainage system from the slope with landscape fabric to prevent soil intrusion.
For Shorter Walls:
Walls under two and a half feet tall do not require elaborate drainage systems but should still use landscape fabric to prevent soil erosion. Bonding stones are essential for structural integrity.
Tools Needed:
- Shovel
- Small sledgehammer
- String and string level
- Stakes to hold the string
- Hand tamper
- Safety glasses
- Tape measure
- Builder’s level
Materials Required:
- Stone
- Landscape fabric
- Aggregate and four-inch drain pipe (for walls over 2.5 feet tall)
- Drainpipe (perforated and solid)
- Backfill material
Calculating Materials:
- Stone: Determine the length, width, and height of the wall in feet. Multiply these dimensions to get the cubic footage and divide by 15 to determine the quantity of stone needed in tons.
- Landscape fabric: Calculate square footage by adding 1.5 feet to the wall’s height and multiplying by the length.
- Drainage aggregate: Calculate cubic footage by multiplying the length, width of the drainage aggregate, and height of the wall. Divide by 27 to get cubic yards.
- Drainpipe: Measure the length of the drainage system behind the wall for perforated pipe and the distance to the drain area for solid drainpipe.
- Backfill material: Calculate cubic footage by multiplying the length, width, and depth of the area to be filled and divide by 27.
Getting Started:
1
Dig a level bottom trench wide enough for the base stones to fit into and with a depth equal to the stone thickness. Compact the bottom with a hand tamper.
2
Set stakes outside the wall ends, so a string can be tied and leveled above the wall’s maximum height.
3
Lay landscape fabric, covering half of the base trench and extending back toward the slope.
4
Determine the lowest point of the trench and start laying the base stones from this point, in both directions, covering the landscape fabric. Ensure the base course is level and use shim stones as needed.
5
Continue stacking courses, stepping back slightly for stability, and lay landscape fabric tight against the wall’s back. Add drainage aggregate, pipe, and backfill for larger walls, keeping the aggregate separated from the backfill with landscape fabric.
6
For walls over two and a half feet tall, install bonding stones every 18 inches of height.
7
Save uniform thickness stones for the cap course. Level the wall before installing the cap course and lap the landscape fabric over the top of the wall. Trim excess fabric and install the cap course tightly to hold down and conceal the landscape fabric.
For walls in public areas or used as sitting walls, consider mortaring or gluing down the cap course with suitable construction adhesive for masonry.
By following these steps and guidelines, you can successfully build a natural stone wall that adds both aesthetic and functional value to your property.
When embarking on the construction of your natural stone wall, take careful consideration of your local climate. If you reside in an area known for harsh winter conditions, it’s imperative that the foundation of your wall extends below the frost line. This precautionary measure is essential to safeguard your natural stone wall from potential collapse. Equally vital is the installation of an effective drainage system, which will mitigate the risk of hydraulic pressure compromising the integrity of your wall.
Should you be ready to start the construction of your natural stone wall, don’t hesitate to reach out to us Camosse Masonry Supply. We stock a wide selection of natural and palletized stone, precisely the materials you need for your natural stone wall project. As seasoned masonry experts, we stand ready to address any inquiries you may have regarding the construction of your natural stone wall. Your vision of a beautiful and enduring stone wall is within reach, and we’re here to assist you every step of the way.